
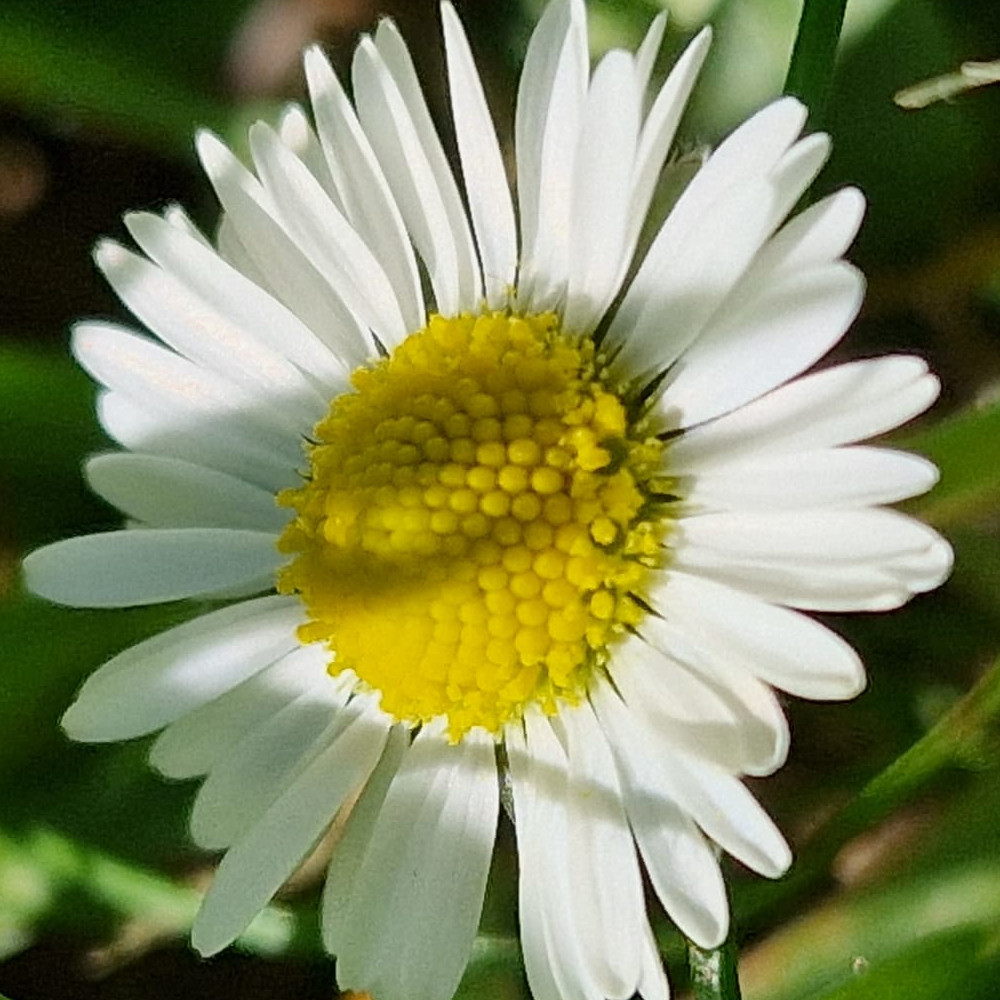
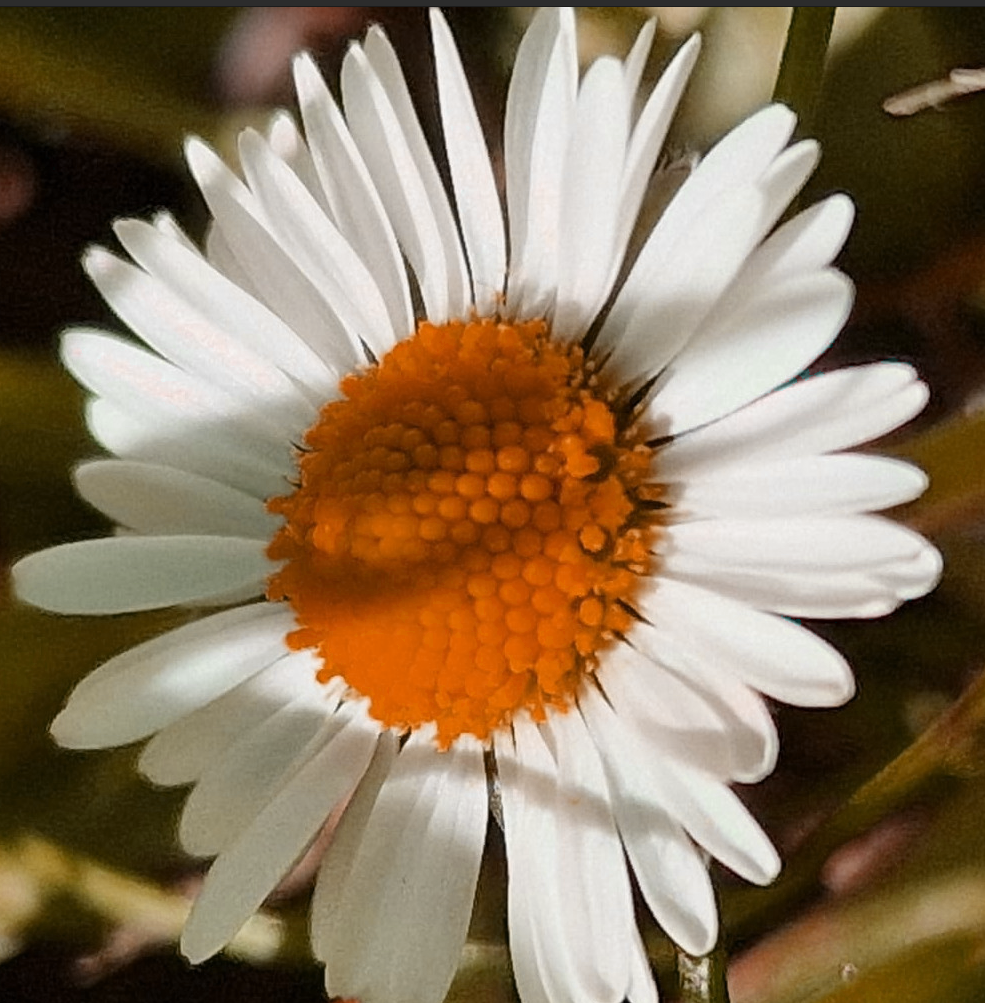
Introduction
In this article, we’ll unveil the secrets behind captivating filter effects that can transform your images in just a few lines of code. We’ve covered various techniques, such as grayscale and sepia tones, manipulating color channels, and adjusting HSV values.
But that’s not all! We encourage you to unleash your creativity and explore further. Feel free to experiment with the methods we’ve provided, tweaking the parameters and trying out different combinations. This way, you can create your very own custom filters and achieve unique visual effects.
Don’t be afraid to play around and see what fascinating transformations you can achieve. You might discover new ways to enhance your images or stumble upon unexpected artistic results. So, grab your code editor, dive in, and let your imagination run wild with these powerful image manipulation techniques!
Step 1 – Setting Up OpenCV:
To get started, you need to have OpenCV installed and properly configured in your Java project. If you haven’t integrated OpenCV into your project, follow the installation instructions specific to your platform and IDE. Once OpenCV is successfully integrated, you can proceed to the next step.
We will use Bitmaps as inputs as this class is often used in Android for mobile apps, for other programms you can directly go with OpenCV Matrices.
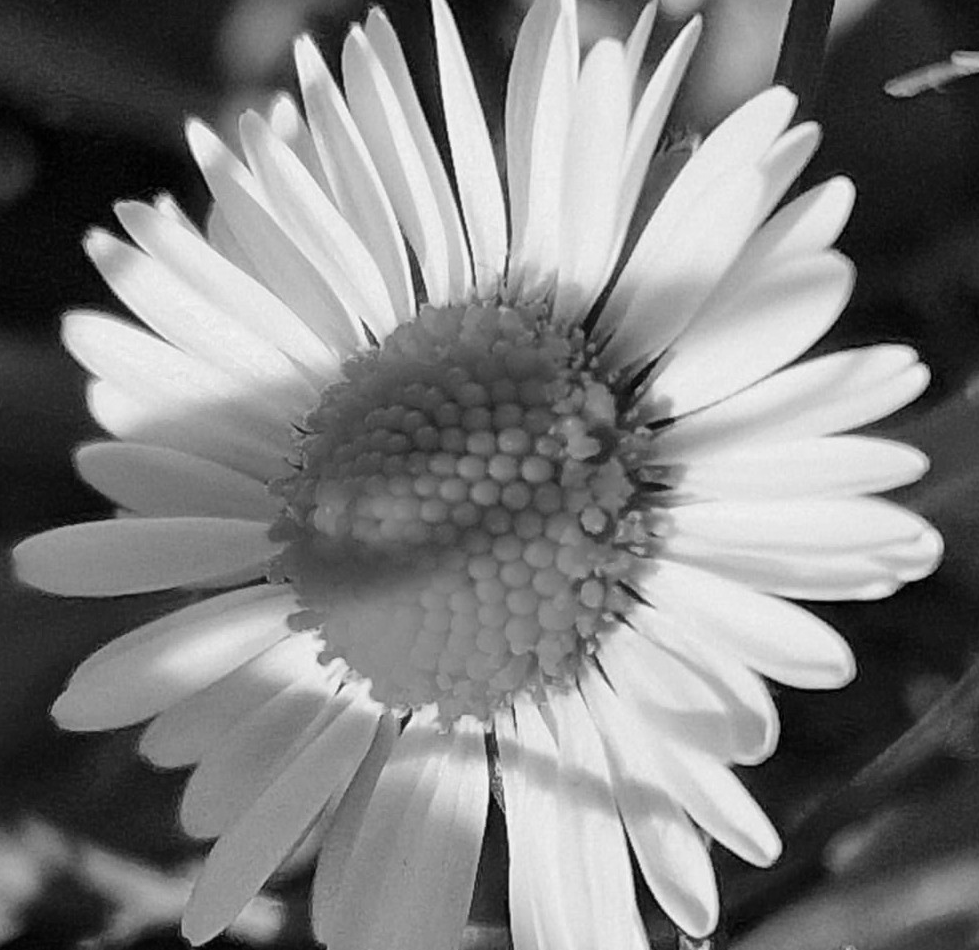
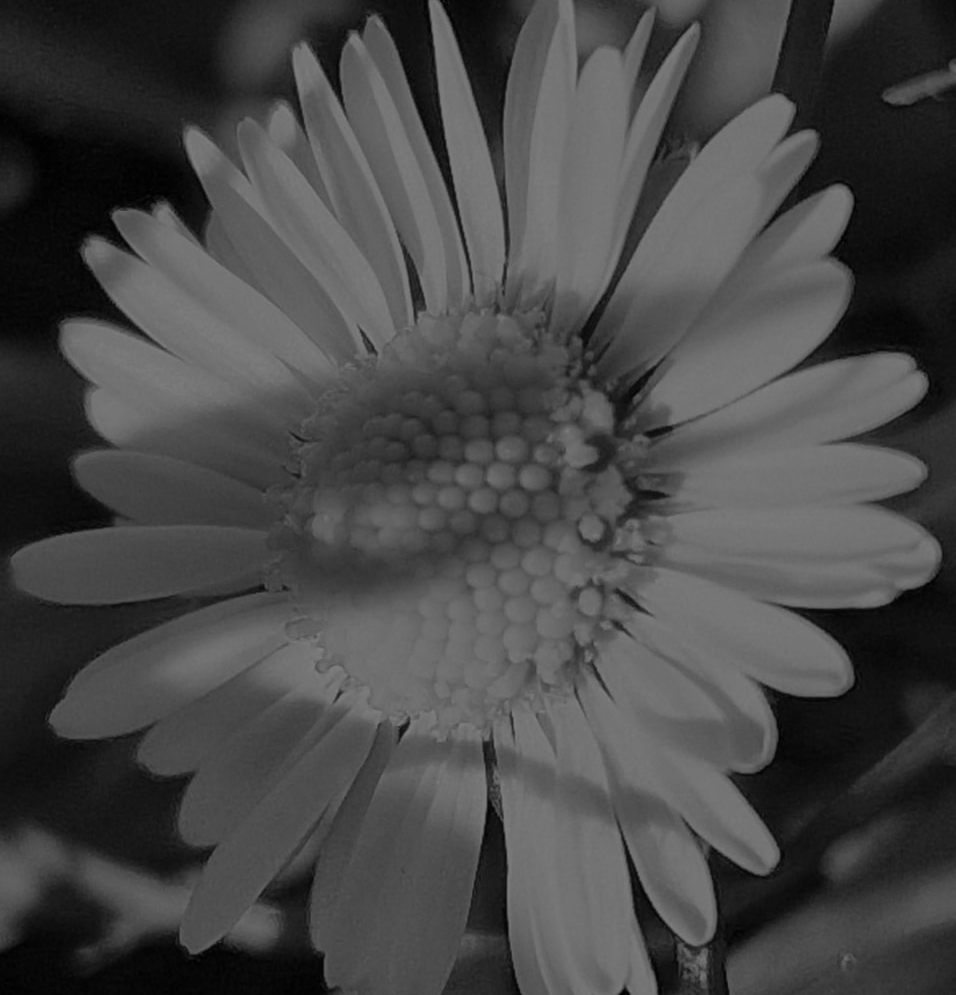
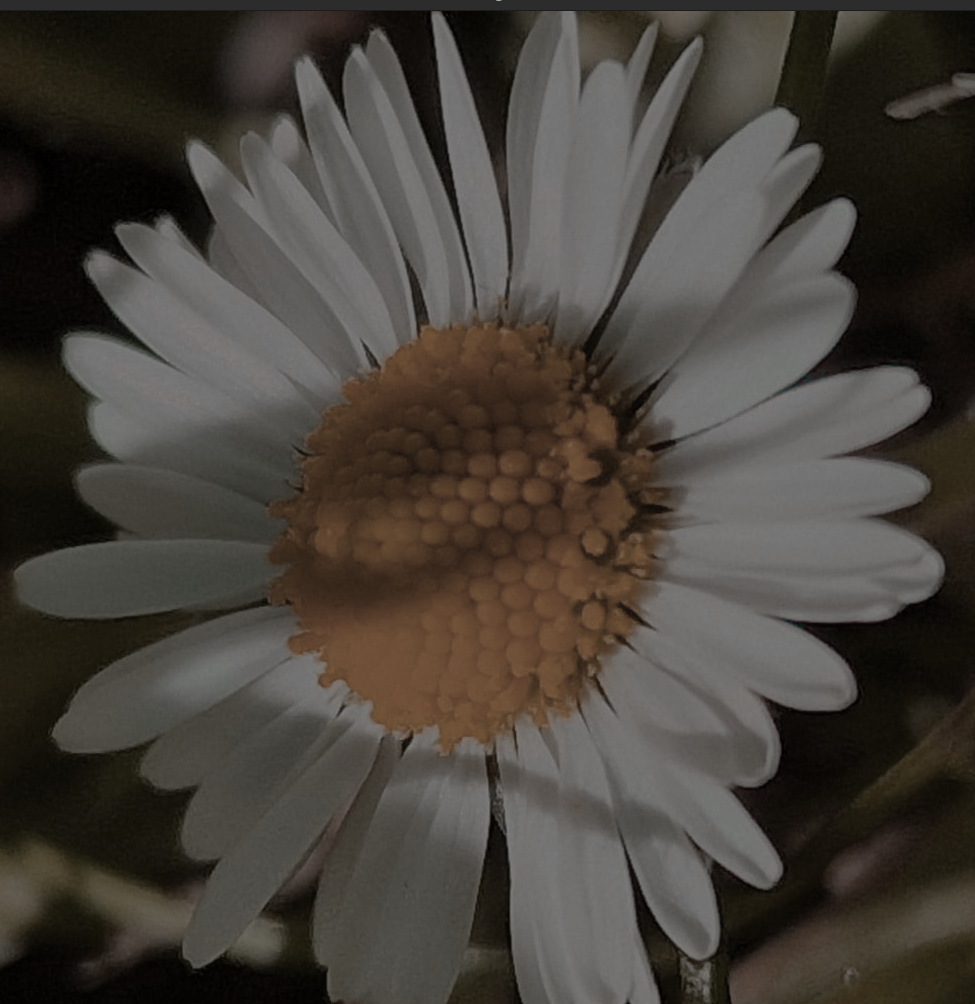
Step 2 – GrayScale Filter:
The grayScale below method takes a source image in Bitmap format and converts it to grayscale. The method first converts the Bitmap source image to a matrix representation, then applies the grayscale effect to the matrix using the cvtColor method. Finally, it converts the resulting matrix back to a Bitmap. This allows you to easily obtain a grayscale version of an image by calling the grayScale method with the source and result Bitmap objects.
public static void grayScale(Bitmap bitmapSource, Bitmap bitmapResult){
        Mat sourceMat = new Mat(); // This is the Matrix of the source Image
        Utils.bitmapToMat(bitmapSource,sourceMat);
        Mat resultMat = new Mat(); // This is the Matrix of the grayScale Image
        Imgproc.cvtColor(resultMat,sourceMat,Imgproc.COLOR_RGBA2GRAY);
        Utils.matToBitmap(resultMat,bitmapResult);
// Now the bitmapResult is in grayScale
    }
Step 3 – Sepia Filter:
Same as grayscale, you can look at the code below and check how we can master it (depending of your plateform, the sepiaKernel may have to be inverted):
    public static void applySepia(Mat sourceMat, Mat resultMat){

        Mat sepiaKernel = new Mat(3, 3, CvType.CV_32F);
        sepiaKernel.put(0, 0, 0.272f,0.534f , 0.131f);
        sepiaKernel.put(1, 0, 0.349f, 0.686f,  0.168f);
        sepiaKernel.put(2, 0, 0.393f, 0.769f, 0.189f);
        Core.transform(sourceMat, resultMat, sepiaKernel);

    }

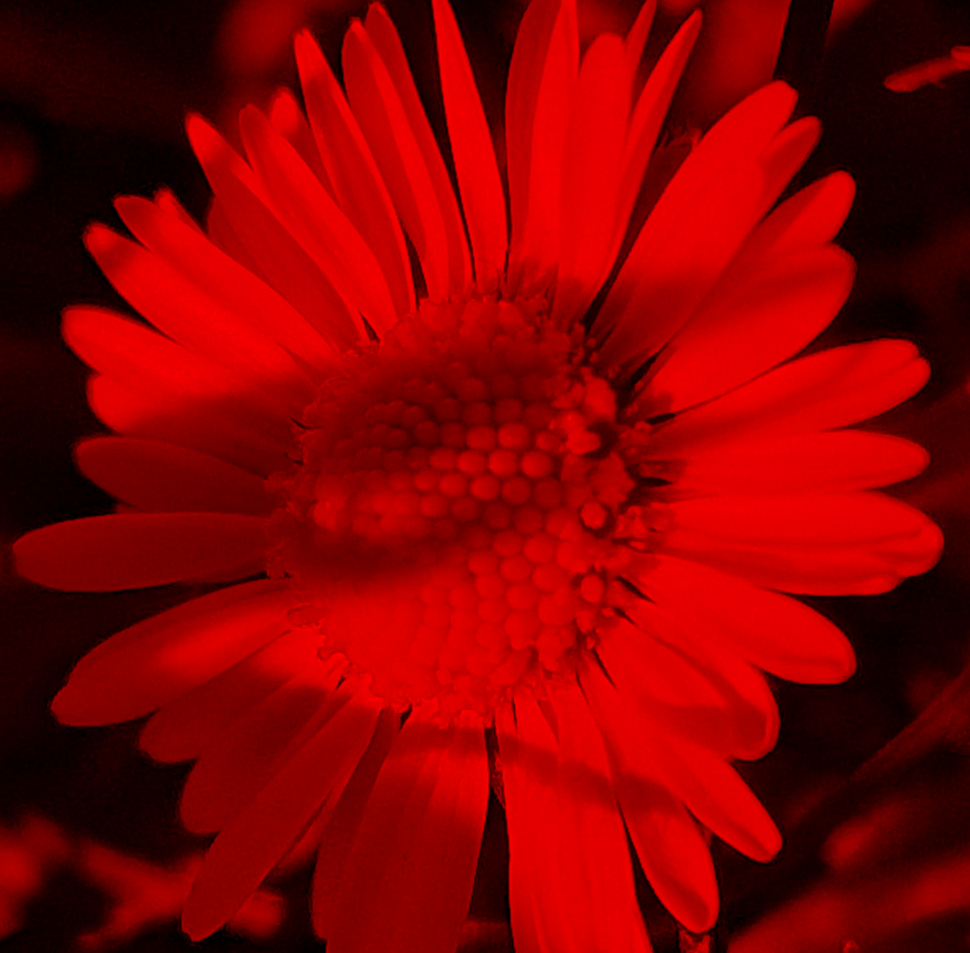
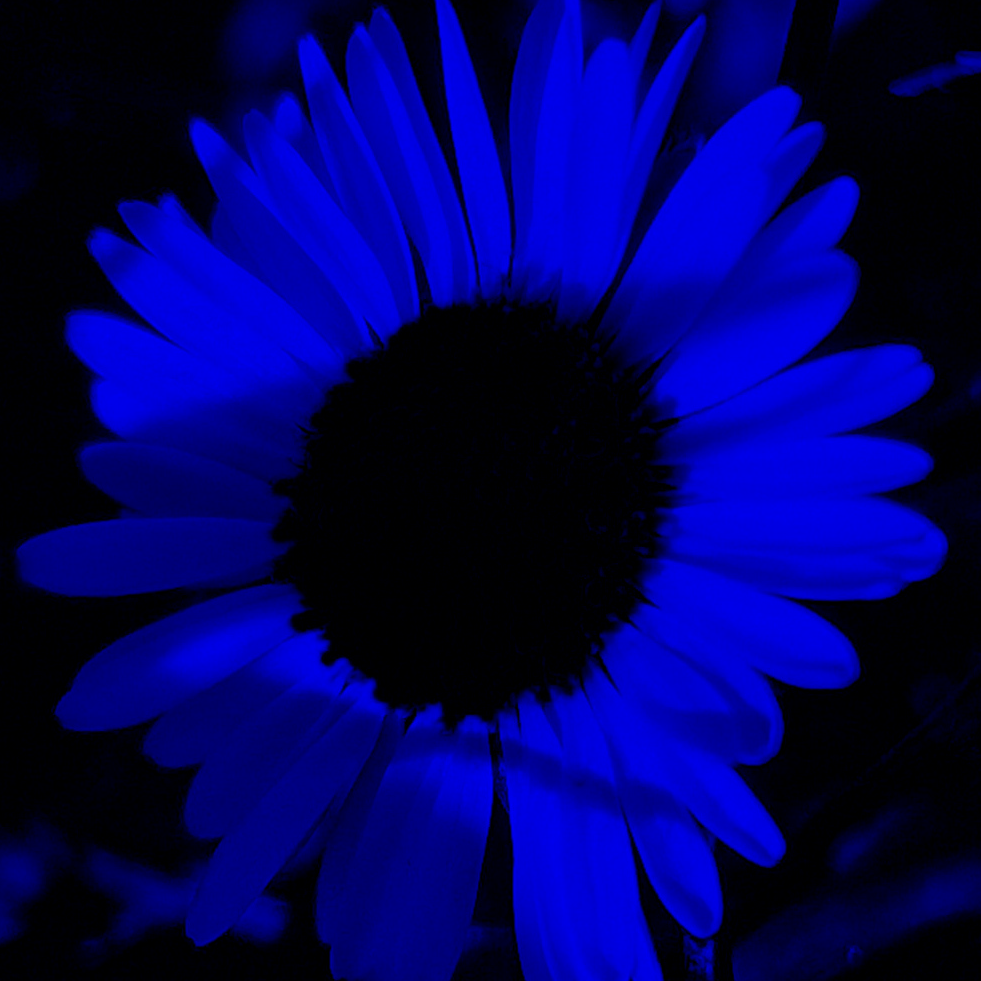
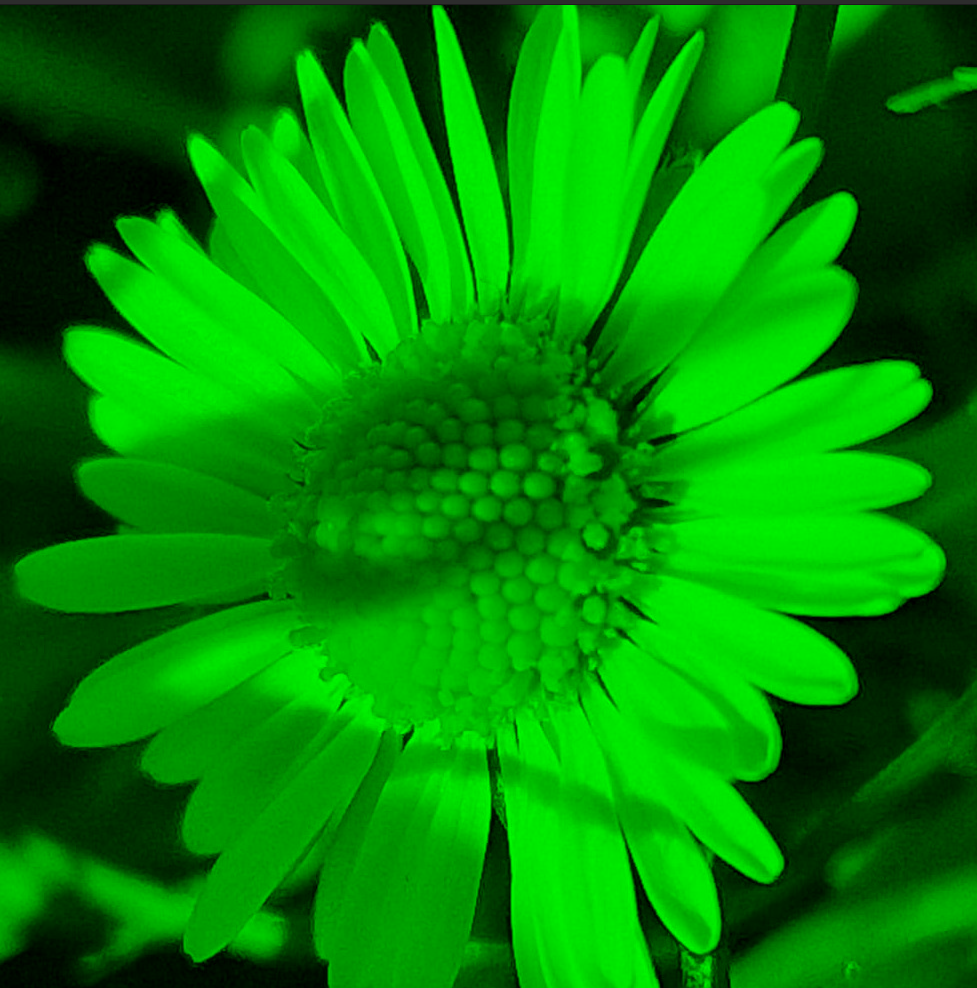
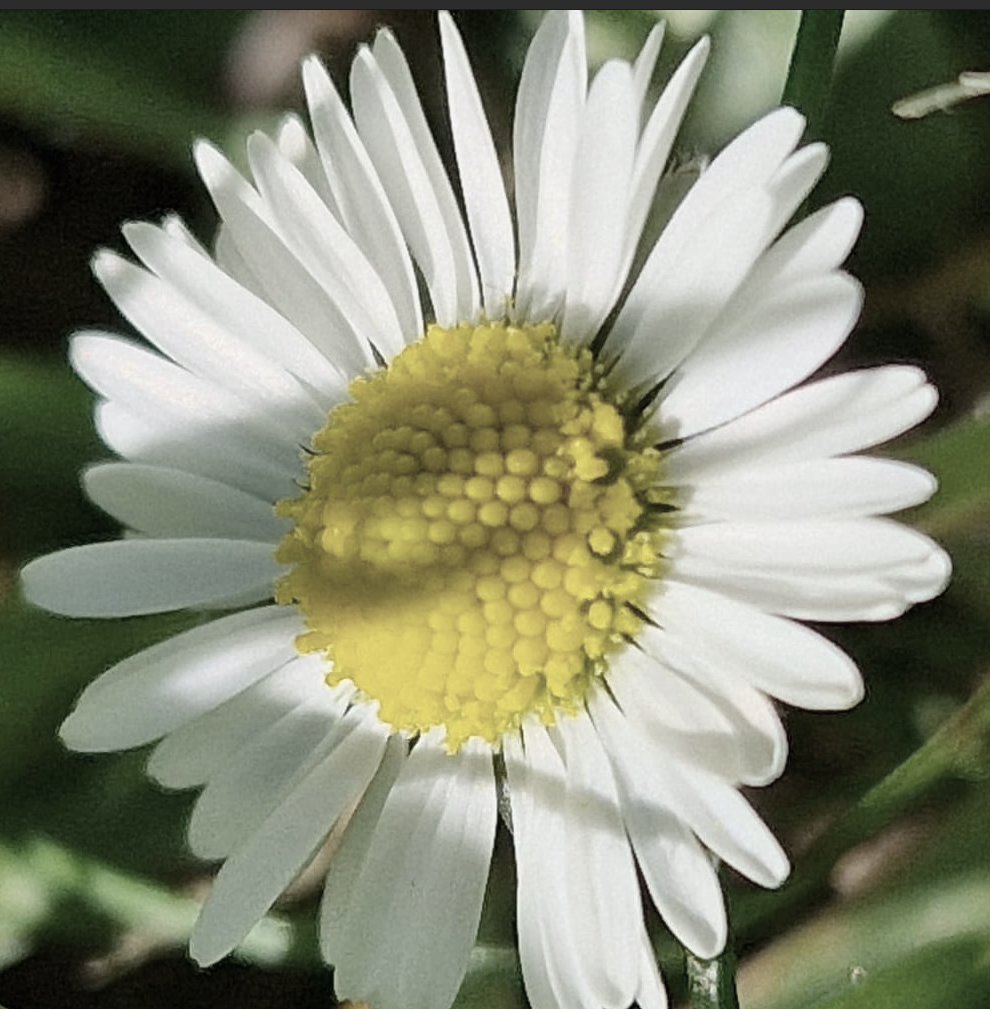
Step 4 – Plat with Colors:
If you want to increase or decrease the red, blue, or green color of a picture you can try the method below (you can play with the different channels in the code below to check, depending of your platform, which is the red, the green or the blue color for you):
    public static void changeColor(Mat sourceMat, Mat resultMat, float redValue, float blueValue, float greenValue){
        ArrayList<Mat> channelsRGB = new ArrayList<>();
        Core.split(sourceMat,channelsRGB);
        Core.multiply(channelsRGB.get(0),new Scalar(redValue),channelsRGB.get(0));
        Core.multiply(channelsRGB.get(1),new Scalar(greenValue),channelsRGB.get(1));
        Core.multiply(channelsRGB.get(2),new Scalar(blueValue),channelsRGB.get(2));
        Core.merge(channelsRGB,resultMat);
    }

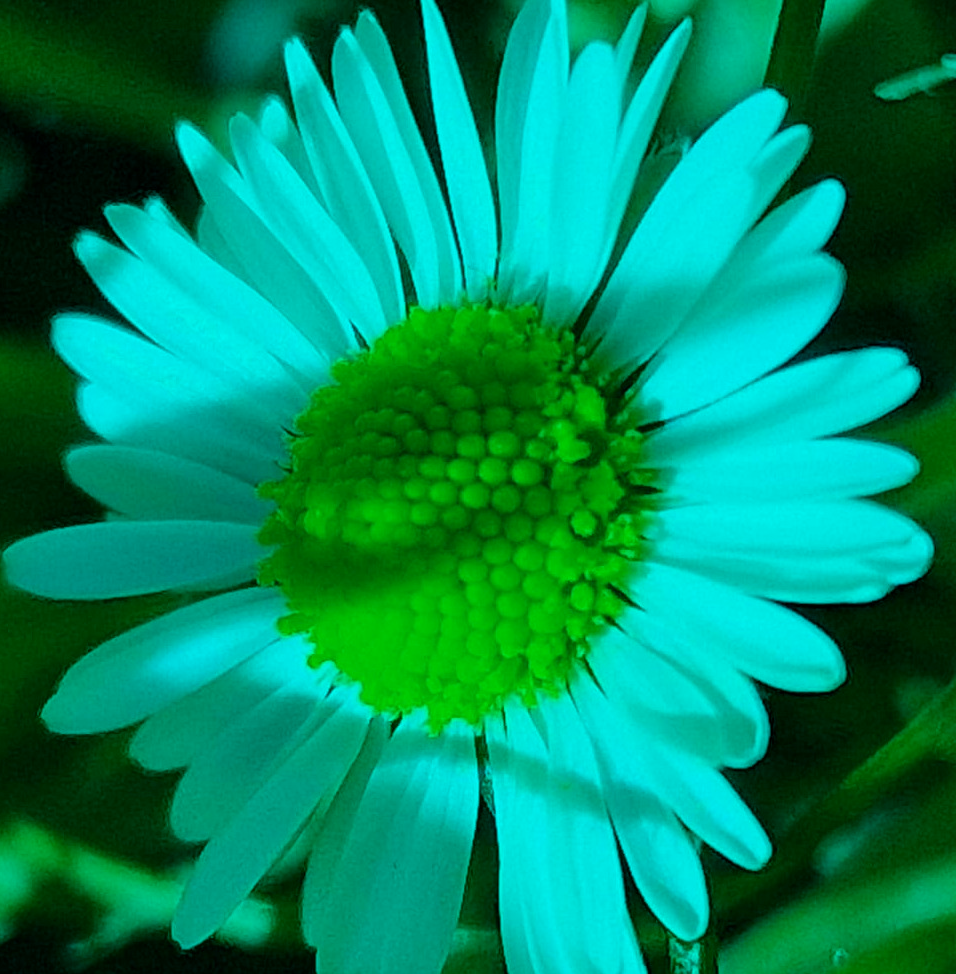
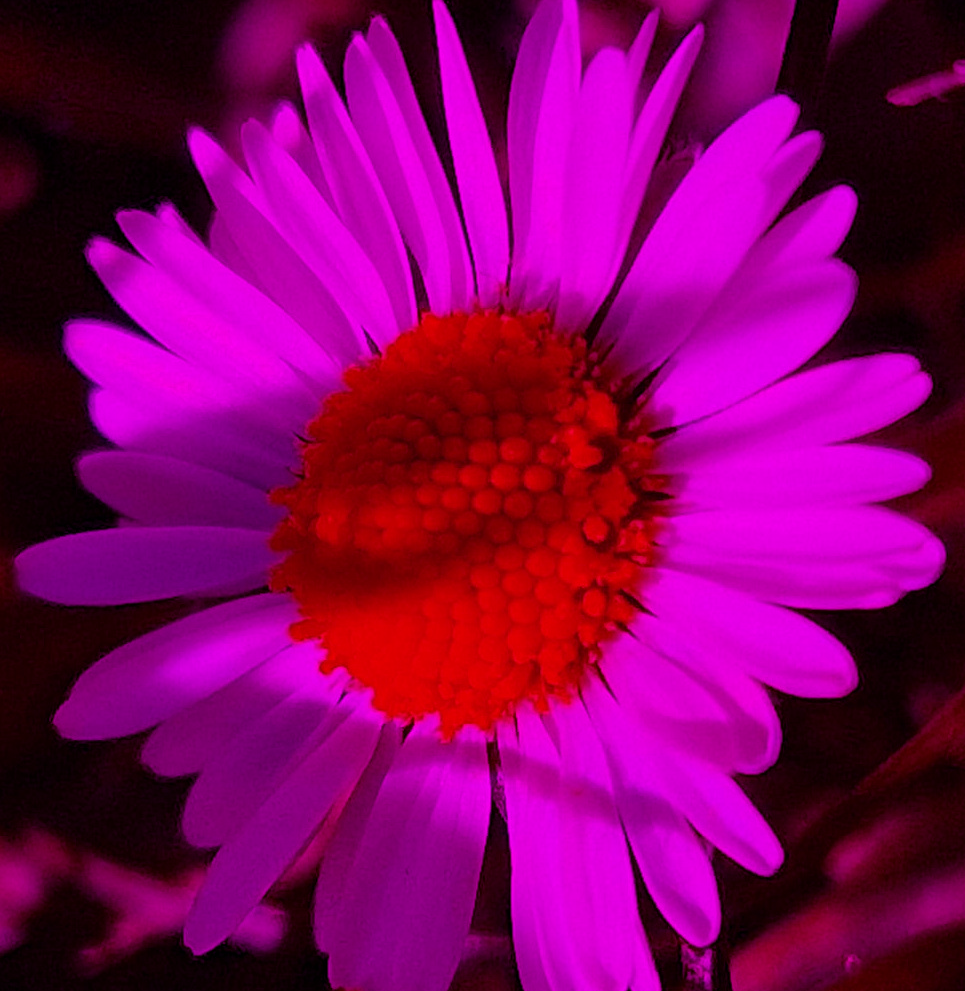
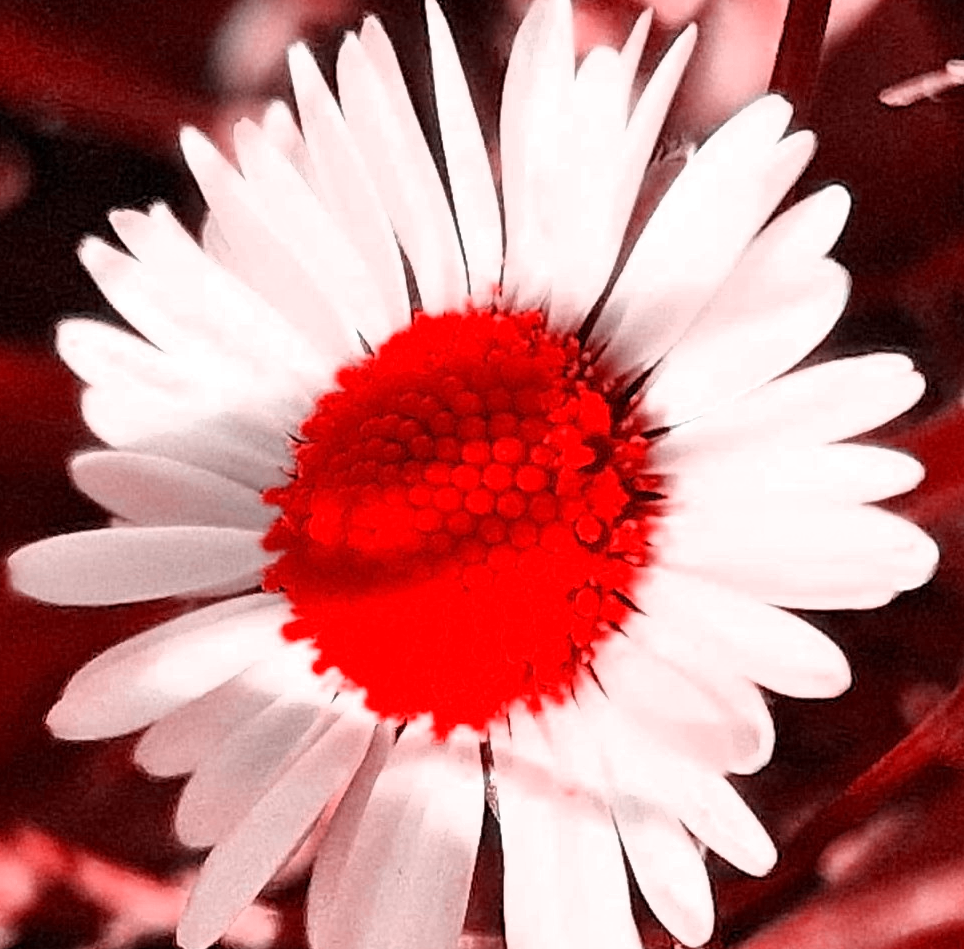
Step 5 – Play with HSV:
The code below allows you to experiment with the H (hue), S (saturation), and V (value) components of an image in the HSV color space. By adjusting the values of H, S, and V, you can change the color tone, intensity, and brightness of the image, respectively. Feel free to play around with different values to explore the creative possibilities and observe the changes in the image.
    public static void changeHSV(Mat sourceMat, Mat resultMat,float HValue, float SValue, float VValue){
        ArrayList<Mat> channelsHSV = new ArrayList<>();
        Imgproc.cvtColor(sourceMat, resultMat, Imgproc.COLOR_BGR2HSV);
        Core.split(resultMat,channelsHSV);
        Core.multiply(channelsHSV.get(0),new Scalar(HValue),channelsHSV.get(0));
        Core.multiply(channelsHSV.get(1),new Scalar(SValue),channelsHSV.get(1));
        Core.multiply(channelsHSV.get(2),new Scalar(VValue),channelsHSV.get(2));
        Core.merge(channelsHSV,resultMat);
        Imgproc.cvtColor(resultMat, resultMat, Imgproc.COLOR_HSV2BGR);
    }
Conclusion:
And here you have it, a few starter filters you can apply to your images with a combinations of theses you could maybe make some Instagram like filters.
Please take note that this code also works on Android and other Java applications with few modification on the matrices and object types (Bitmap, images, etc.).

Leave a comment