
XMPP is a messaging protocol that can be used to develop robust chat applications. Using Swift and XMPPFramework, we’ll teach you how to build your own XMPP client on iOS and how to handle connections and Stanzas. If you’re interested in the equivalent article on Android, feel free to have a look at : Connect to an XMPP Server with Smack Android, where we use the smack library to create a small XMPP client on Android!
What we’ll build:
We’ll create a Model that can handle connections, login, and sending and receiving messages.
How we’ll get there:
We’ll be using the XMPPFramework Library (which can be found here on GitHub: https://github.com/robbiehanson/XMPPFramework) to implement the connection to our server.
Setting up the library:
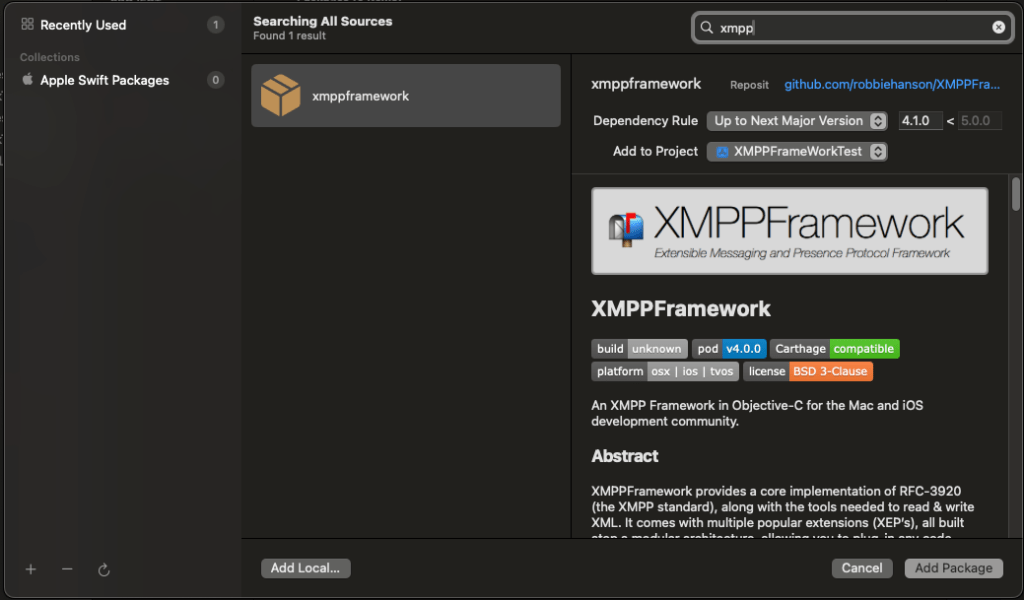
Create a new Xcode project and add the XMPPFramework library to your package dependencies.
Connecting to the server
We’ll now implement connection to the XMPP Server by:
1/ Creating a new swift class that we’ll call XMPPModel.
2/ We’ll add delegates to initialize the connection.
3/ We’ll connect and authentify on the server.
1/ Creating the XMPPModel:
We’ll begin by creating a class XMPPModel extending NSObject and ObservableObject. We’ll define a few variables:
An XMPPStream which represents the ongoing connection to your server.
A hostname and port (usually 5222) to specify the address of your server.
A userJID and password, since once you are connected, you will need to authentify!
class XMPPModel: NSObject, ObservableObject{
var xmppStream: XMPPStream
var hostName: String
var hostPort: UInt16
var userJID: XMPPJID
var password: String

    override init(){
            let Id = "you"
            let userJID = XMPPJID(string: "\(Id)@server.hostname.com")
            self.hostName = "server.hostname.com"
            self.userJID = userJID!
            self.hostPort = 5222
            self.password = "MyVerySecurePassword"
            self.xmppStream = XMPPStream()
            self.xmppStream.hostName = hostName
            self.xmppStream.hostPort = hostPort
            self.xmppStream.startTLSPolicy = XMPPStreamStartTLSPolicy.allowed
            self.xmppStream.myJID = userJID
            super.init()
// We'll define these two in the next section
            self.xmppStream.addDelegate(self, delegateQueue: DispatchQueue.main)
            connect()

    }
}
2/ Creating the delegate:
The delegate allows us to perform certain actions on connection, authentication and authentication failures, which makes it handy for informing your user that they entered invalid credentials for example.
extension XMPPModel: XMPPStreamDelegate {
func xmppStreamDidConnect(_ stream: XMPPStream) {
    // We managed to connect to the server, huzzah!
    print("Stream: Connected")
    try! stream.authenticate(withPassword: self.password)
}

func xmppStreamDidAuthenticate(_ sender: XMPPStream) {
    // We managed to identify!
    print("Stream: Authenticated")
}

func xmppStream(_ sender: XMPPStream, didNotAuthenticate error: DDXMLElement) {
    // Handle authentication errors here!
    print("Stream: Fail to Authenticate")
}
3/ Connecting to the server
Connecting to the server is easy as we’ve set most of the parameters to do so alread:
func connect() {
//Double check we're not connected or connecting already!
  if xmppStream.isConnected || xmppStream.isConnecting {
            print("Already connected or connecting")
                   return
   }
  do {
   try xmppStream.connect(withTimeout: XMPPStreamTimeoutNone)
                 print("Attempting to connect...")
       } catch {
     print("Failed to connect:\(error.localizedDescription)")
                   }
}
Sending and receiving messages
Now we’re connected, and authentified (hopefully!). The next step is to be able to send messages and to receive them!
Sending a message
To send a message, implement the following method in your code:
func sendMessage(_ messageText: String, to recipientJID: XMPPJID) async {
       //You can add your own stanzaID generator here, to identify stanzas sent from the app, for example
        let stanzaID = "12345"
        // Create a text message adressed to the recipient
        let message = XMPPMessage(type: "chat", to: recipientJID, elementID: stanzaID)
        // That's where you put the subject of your message!
        message.addBody(messageText)
        message.addSubject("Some subject")
         xmppStream.send(message)

  }
To create a message you’ll thus:
1/ specify a recipient JID (the adress of the person your sending the message to on the server). It’ll be in the format of user@server.com and can be generated using the same XMPPJID constructor we used to login.
2/ specify a unique stanza ID to identify your stanza
3/ set a body and subject to your message
Receiving a message
As the adage says, what goes around comes around and the same goes for XMPP stanzas apparently. To receive a message you’ll need to modify your Delegate and implement the following method:
func xmppStream(_ sender: XMPPStream, didReceive message: XMPPMessage) {
     print(message.body)
    }
In this method, you’ll want to add anything you want to do to process your message, like updating your UI, adding it to a database…
Closing notes
With this model, you have the basics to create a simple, working XMPP connection in your iOS app. We’ll go over more complex features of the XMPPFramework in a future article and we’ll show you how to send more complex stanzas, join chatrooms and much much more!

Leave a comment